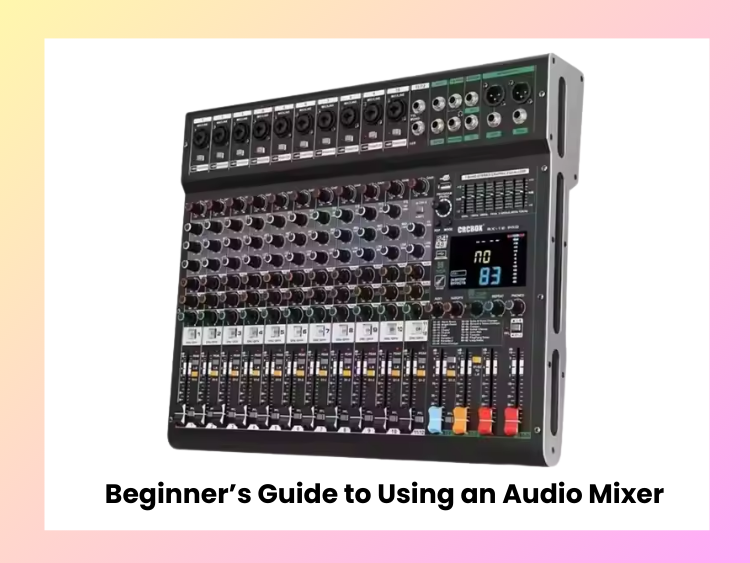
An audio mixer – or audio mixing desk – devolves on an outline of the things which individuals use to create a sound for live occasions or transmission. Singers, podcasters, event planners – whoever you are – learning how to use an audio mixer will make your sound so much better. This guide will help beginners in audio mixers understand what they are, their major components, and how to use the mixers for different purposes.
What is an Audio Mixer?
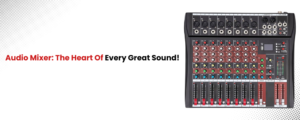
An audio mixer is a device that combines, balances, and adjusts multiple audio channels of microphones, instruments, and recorded tracks. It enables volume adjustment, EQ addition, effects addition, and directing sounds to speakers or recording devices.
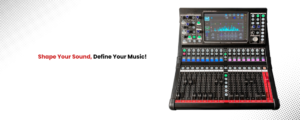
Mixers are the missing link in the chain for live sound, studio recording, broadcasting, and podcasting. There are lots of different types of mixers and mixing consoles, from analog mixers that favor hands-on control to digital mixers that boast features and preset, to powered mixers with built-in amplification, to software mixers for DAWs.
Whether for a concert, a studio session, or even a live stream, an audio mixer makes sure the sound is clear and sounds professional-level.
What Are the Key Elements of an Audio Mixer?
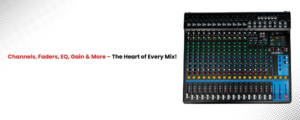
- Channels: Separate inputs for mics, instruments, or line sources. Each channel has volume, EQ, and effects controls.
- Gain Trim: Settings for adjusting the levels for an input signal.
- Equalization Controls: For an evening out, the bass, middle, and treble frequencies.
- Faders: These sliders control the volume coming from each channel, allowing for a smooth mix.
- Pan Control: Pans the sound (left/right) in the stereo field.
- Aux Sends: Sends audio to external effects processors or monitors.
- Built-in Effects: Some mixers come with built-in effects like reverb, delay, and compression, which can provide extra processing for your sound.
- Master Section: Overall output level and routing to speakers or recording devices.
- Phantom Power: Supplies power to condenser microphones that require power from an external source.
- Connectivity Ports: USB, Bluetooth, XLR, ¼-inch, RCA.
Any music you write is required to produce a pro-sounding, balanced sound mix.
Types of Audio Mixers
There are several types of audio mixers used in different applications. Here are the main types:
- Analog Mixers: A conventional salvo of analog mixers feature physical buttons and faders that allow you to control each channel by hand. These are tried and true, easy-to-use headphones meant for use both in live sound and in the studio.
- Digital Mixers: Mixers based on digital signal processing (DSP) are provided with easy-to-use digital signal processing (DSP) technology. They offer instant recall, automation, onboard effects, and remote operation from software or apps. Ideal for commercial studios and large events.
- Powered Mixers: Include their own amplifiers, so there is no need for separate power amps. They’re small, making them great for small events, PA systems, and portable setups.
- Software Mixers: The software mixers found in Digital Audio Workstations (DAWs). These are used for mixing, editing, and recording audio on a computer. It is also popular among podcasters and music producers.
- DJ Mixers: Designed for DJs, these mixers help smooth the transition between tracks and live sets with crossfade functionality, EQ controls, and effects.
There are various types for different uses, from live sound reinforcement to professional music production.
How to Use an Audio Mixer: A Step-by-Step Guide
Step 1: Connect Your Audio Inputs
- This left part is where you connect media input devices, microphones, or instruments to the input channels.
- Microphones will require XLR cables, and instruments will require 1/4-inch jacks.
Step 2: Set the Gain Levels
- Begin with the gain knob at the lowest level.
- Then increase slowly until the signal meter indicates a good strong, non-clipped signal.
Step 3: Equalization (EQ)
- Boost or attenuate the bass, mids, and treble to shape the tone.
- For vocals, take some of the bass out and add some midrange so it’s clear.
- For drums, use high-end roll-off to fatten the sound.
Step 4: Aux Sends (Monitors & Effects)
- Use AUX sends to route audio to stage monitors or outboard effects.
- Set a good monitor mix so they can hear themselves.
Step 5: Make Use of Audio Panning and Balance
- Panning — like gaining — is critical in creating space.
- For example, a guitar will exit in this direction to the left; keyboards will exit that direction to the right.
Step 6: Level Control — Fader Position
- As a rule, faders should be left at unity gain (0 dB).
- Get individual channels’ levels as balanced as possible for a clean, clear mix.
Step 7: Add Effects & Processing
- Consider using built-in effects such as reverb for vocals or delay for guitars.
- Check that effects are not drowning the mix.
Step 8: Set the Master Volume
- Use the main fader to set the loudness of everything.
- Ensure levels are firm but not driving into distortion.
Tips for Better Mixing
Achieving a great mix requires technique and attention to detail. Here are some key tips:
- Level All Instruments: No instrument or voice should overwhelm the mix. Match levels closely between the faders on an individual basis.
- Process Wisely: Attenuate rather than add too much. Reduce low-end muddiness and enhance the clarity of vocals.
- Purposeful Panning: Panning helps place instruments and vocals throughout the stereo field in a mix.
- Dynamic Control with Compression: When used gradually, compression helps smooth over amplitude differences and gives the mix a little polish.
- Don’t Overuse Effects: If you use reverb, delay, or effects, they shouldn’t flood the mix but season it out.
- Do the Listening Test in Various Environments: Make sure you listen to your mix back on headphones, speakers, and different sound systems to ensure it sounds the same.
- Use the Best Inputs: Better mics and instruments yield a cleaner mix with less need for processing.
- Monitor for Clipping: Always keep below clipping levels. Avoid seeing red peaks on the meter.
- Send Custom Mixes: Use aux sends with custom mixes (for home musicians) or to some outboard gear in a patch.
- Use Your Ears: Meters and visual guides are helpful, but the final mix is meant to sound good to the listener. Be aware that ear fatigue can set in, so take breaks.
Conclusion
The audio mixer is a little more complicated in its application, but it is one that can be learned quickly. Once you know some basics, you’ll have everything you need to generate professional-sounding audio – live shows, recording, on-air. When you start, just keep it simple, play around with different settings, and build your knowledge further. An audio mixer can be used in any sound experience that you can think of – making music in a band, a podcast, or DJ set.