Introduction
Mixing drums with an audio mixer helps create a powerful, clear sound. Start by checking phase alignment to ensure all mics work together without causing muddiness. Compression adds punch while maintaining natural dynamics, and reverb enhances depth without overpowering the mix.
For a polished result, bus processing smoothly blends the elements, while transient shaping keeps the drums crisp and impactful. With these simple techniques, your drum tracks will sound balanced and professional in any setup. In this blog, we’ll provide a step-by-step guide to drum mixing using an audio mixer, incorporating techniques and insights from professionals.
Step-by-Step Guide to Mixing Drums

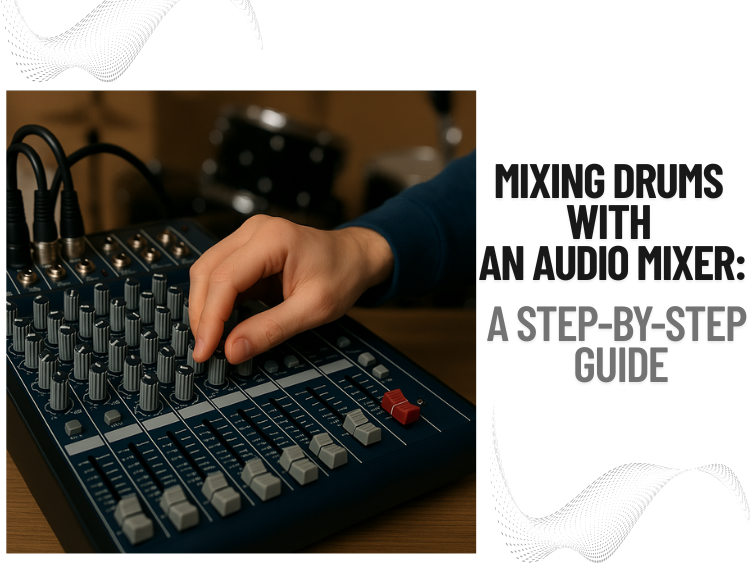
Step 1: Setting Up Your Mixer
- Assign each drum mic very carefully onto separate channels on the mixer.
- Balanced XLR cables minimize noise pretty effectively and reduce electromagnetic interference substantially in most recording setups, obviously.
- Set up channels quickly for kick drum overheads, snare toms, and hi-hats on your mixing board.
Step 2: Understanding Your Drum Kit Setup
Familiarize yourself thoroughly with drum kit setup before tweaking any knob or fader recklessly on the control surface. Commonly a standard config comprises various components anyway.
- Kick Drum
- Snare Drum
- Hi-Hats
- Toms (Rack and Floor)
- Overhead Cymbals
- Room Microphone (if applicable)
Each component plays a disparate role, requiring singular treatment quietly. Pay heed keenly to how each sonic component resonates roughly and jot down mental memos regarding needed tweaks like added oomph or reduced murkiness.
Step 3: Organizing each channel
Organization remains utterly crucial somehow. Label each mixer channel corresponding roughly with drum mic inputs on your setup very carefully now. Take this instance.
- Channel 1: Kick
- Channel 2: Snare
- Channel 3: Hi-Hat
- Channels 4–5: Toms
- Channels 6–7: Overheads
- Channel 8: Room Mic
Mark them with tape or color-code if necessary. This facilitates rapid identification of elements during mixing so adjustments can be made smoothly and fairly effortlessly afterwards.
Step 4: Gain Staging
Set proper gain levels before slapping on some EQ or squashing the signal with compression pretty heavily nowadays. Strong input signals are ensured by this step so clipping doesn’t occur.
- Solo each channel thoroughly now.
- Crank the gain knobs pretty high and keep an eye on the level meter keenly for optimal signal while maintaining a robust signal with minimal distortion.
This step alone can greatly improve clarity and prevent distortion utterly with somewhat significant efficacy in most cases.
Note: Ultra-low noise preamps in the 5 Core Audio Mixer provide crystal-clear sound remarkably well for professional recording applications.
Step 5: Equalization (EQ) Each Drum Component
Shaping begins in earnest with equalization. Some fairly useful tips are presented here.
- Kick Drum: Boost low frequencies around 50–100 Hz deeply and cut mids between 300–500 Hz, reducing boxy sounds; boost beater click sharply around 3–5 kHz.
- Snare Drum: Boost presence around 1-3 kHz quite liberally for added crispness and clarity in resultant audio output effectively. Boost 200 Hz heavily for full-bodied sound, cut frequencies around 400–600 Hz to reduce muddiness, and enhance 5–7 kHz sharply for crisp attack.
- Hi-Hats and Cymbals: Blend hi-hats skillfully with precision EQing and judicious compression for maximum clarity and a thumping deep groove in drum mixes. Boost around 8–12 kHz for shimmer and roll off lows below 200 Hz carefully to avoid rumble mostly in that range.
- Toms (Rack and Floor): Tweak mid-range frequencies slightly for added warmth or increased clarity in your sound setup effectively now. Boost fundamental frequencies around 100–250 Hz rather vigorously and scoop out muddiness in midrange frequencies for added clarity.
- Overhead and Room Mics: Gentle boosts in highs paired with high-pass filtering clean up the low end pretty effectively, yielding clarity and fairly decent spatial definition underground now.
Step 6: Compression for Consistency
Compression helps control dynamics and glue drum kits together tightly with quite a bit of sonic cohesion.
- Kick and Snare: Apply medium compression (ratio: 4:1), fast attack, and medium release to emphasize punch.
- Toms: Use subtle compression to maintain their natural dynamics.
- Overheads: Gentle compression can even out swells on cymbals and help bind stereo imagery fairly tightly around the soundstage.
- Drum Bus (if using one): Apply bus compression to add cohesion—use a slow attack and fast release to retain transients.
Apply compression carefully to control dynamic range and prevent sudden jarring volume spikes from occurring on playback suddenly.
Note: 5 Core Mixers feature built-in compression for smoother drum mixes.
Step 7: Panning for Stereo Balance
Position drums in the stereo field to mimic a natural drum setup. Pan toms subtly from side to side, keeping the kick drum firmly centered and the snare drum locked in place. Proper panning adds width and realism to your drum mix.
- Kick and Snare: Keep centered
- Hi-Hats: Slightly to one side (right from drummer’s perspective)
- Toms: Pan slowly from left across toms ranging low in pitch on the left and high on the right
- Overheads: Pan sharply left and somewhat right, capturing stereo imagery deeply
- Room Mics: Pan extremely wide for cinematic depth and surrealistic ambience suddenly.
Imagine sitting behind the drum kit and panning accordingly to maintain a natural perspective.
Step 8: Reverb and Effects
Reverb used tastefully makes drums sound obscenely huge and larger.
- Snare Reverb: Room reverb or short plate adds considerable sonic body pretty effectively.
- Toms: Add fairly dramatic flair with medium hall reverb settings for an echoey atmosphere somewhat reminiscent of old cathedral acoustics.
- Overheads and Room Mics: Natural room ambience is often enough, but a touch of extra space can help.
Keep reverb somewhat understated and on purpose rather than drenching the entire mix recklessly with tons of ambiance and muddy sound.
Note: 5 core audio mixers flaunt a staggering 99 DSP effects, eclipsing rivals like Yamaha or Behringer pretty handily, it seems, nowadays.
Step 9: Final Balancing and Automation
Once each element is EQ’d, compressed, and panned:
- Adjust individual faders for a cohesive blend and to balance drum levels.
- Ride the faders during transitions (e.g., drum fills).
- Automate levels of reverb or volume heavily for various song sections quite differently.
Dynamics are added, and listener engagement stays high rather unusually.
Note: Use 5 Core’s Bluetooth and USB connectivity for seamless integration with recording setups.
Step 10: Reference and Compare
Always compare your mix with professional drum recordings.
- Reference tracks similar in genre and style should be utilized thoroughly during production and sound design phases very effectively.
- Match tonal balance, loudness, and spatial quality.
- Make adjustments to bring your mix closer to industry standards.
Step 11: Trust Your Ears
At the end of the day, no tutorial or preset can replace your ears. Take breaks. Listen in different environments (studio monitors, headphones, car speakers). Develop your own sonic fingerprint rather instinctively and trust gut feelings deep within creative turmoil.
Conclusion

Mixing drums with an audio mixer is a blend of technical skill and artistic intuition. By following these steps, you’ll build a solid foundation for a powerful and polished drum sound. Remember: every drummer, kit, and room is unique, so always adapt these guidelines to fit your situation.
For more tips, gear reviews, and expert techniques, visit us at Audio Mixers—your go-to resource for all things mixing.