
If you’ve worked a gig where the singer’s yelling for more vocals or the drummer’s waving for more kick, you know monitors make or break player confidence. Aux sends are your secret weapon—they let you build custom mixes for every wedge or in-ear, so the band hears what they WANT, not just what the audience gets.
Done right, you avoid mid-set chaos and keep everyone on time, in tune, and happy all night. Let’s make those “can’t hear myself” moments a thing of the past.
As clearly instructed in the live sound guide from Yamaha Music, the essential steps are: first, assigning the desired channel inputs (e.g., vocals, drums, guitar) to a specific Aux Send (e.g., Aux 1); second, setting the Aux Send to “Pre-Fader” mode, which ensures the monitor mix volume remains constant for the performer, regardless of changes to the main house mix fader; and third, adjusting the individual channel’s Aux Send knob to determine the specific level of that instrument that the performer hears in their monitor, ultimately allowing the engineer to build a dedicated mix that is unique to each monitor wedge or in-ear system
Step 1: Get to Know Your Console
Find those aux send knobs—usually, each channel on your mixer has its own little “aux” dial. These dials control how much of that channel’s signal (vocal, guitar, kick drum) goes to each monitor mix. The trick is knowing if your sends are:
- Pre-fader: Best for monitors. Turning the main mix up/down won’t mess up what’s in the monitors.
- Post-fader: Usually for effects (reverb, delays). Changing channel levels changes monitor levels too—not ideal if you want stable sound for performers.
Ask yourself: Are my auxes pre or post? If in doubt, hit the manual or ask a local sound nerd.
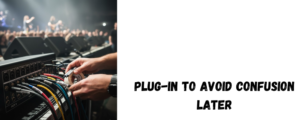
Step 2: Plug in and Label Everything
Run a cable from each aux output to the monitor speaker or in-ear pack you want to use. Seriously, label the cables (“Drum Wedge,” “Vox-Left,” etc.) with tape—it saves panic later.
Double check you’re not accidentally routing FOH (Front of House) audio to monitors. That’s guaranteed feedback city.
Step 3: Build Each Player’s Mix—One at a Time
Start every aux send at zero—don’t guess. Have each musician play/sing and slowly dial up just what THEY need. Most common:
- Drums want kick and snare, plus a tad of bass.
- Singers want self, maybe some keys and guitar.
- Guitarists want mostly vocals and rhythm.
Tip from experience: Don’t pile every channel into every monitor. Less is usually more. If the guitar soloist can hear too much keyboard, it’ll just get muddy.
Step 4: Tame Feedback and Surprises
Before the show starts or during soundcheck, push the mix a bit louder than you expect and listen for squeals or hums. If feedback isn’t tamed now, it’ll wreck the show later.
If a player gets lost mid-set, have the sound tech tweak their aux send, NOT the main mix. And don’t be shy—if something hurts, say it! Bleeding ears won’t help anyone make music.
Step 5: Stay Calm, Stay Flexible
Bandmates WILL change their minds. The keys player might want more bass after three songs, or the drummer realizes he’s missing vocals in his wedge. With aux sends, adjust without killing the whole mix. Keep a finger on the mute switch for fast emergencies.

Summing Up With Battle-Tested Tips
- Label your auxes with tape (or a label maker—seriously).
- Pre-fader for monitors, post-fader for effects.
- Less is more—don’t feed every input to every monitor.
- Tweak mid-set if required—never wait for the break.
Bottom Line
Aux sends are what let a band move from messy rehearsals to killer shows. They seem intimidating, but after a few honest soundchecks you’ll wonder how you ever gigged without them.
Got the gear? Got ten minutes for setup? You’re ready to sound better tonight.
Here you can also find amazing drum thrones; alternatively, browse our page to find the best keyboard bench, audio mixers, drum mics, piano bench, keyboard stand, speakers, party speakers, and more