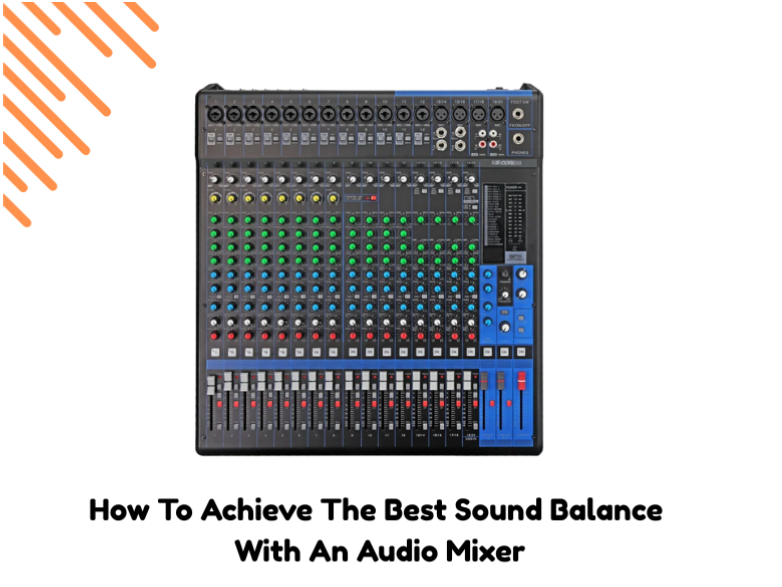
Getting the right sound mix is very important for ensuring the sound is good for both recordings and live performances. You’ll need an audio mixer to get that balance, which lets you change different parts of the sound in real time. Knowing how to use EQ and audio mixing methods can make all the difference in getting a clean, clear, and powerful sound, whether you’re mixing music, speech, or live sound. This blog post will show you how to get the best sound balance with an audio mixer, from learning how to use the basic features to fine-tuning the EQ settings for the best sound.
Understand Your Audio Mixer
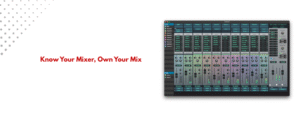
Before you start learning how to mix, you need to know how your audio mixer generally works. An average audio mixer has several channels, each meant to handle a different sound source, like a microphone, an instrument, or a recorded track. What each channel has:
- Volume Faders: These allow you to adjust the overall loudness of each sound source in your mix.
- Pan Control: This determines the position of each channel in the stereo field, placing sounds from left to right in your mix.
- Equalizer (EQ): The EQ section lets you fine-tune the low (bass), mid, and high frequencies of each input, helping shape the tonal balance.
- Aux Sends: These route audio signals to external effects processors, such as reverb or delay, without affecting the main mix.
If you’re new to mixers, check out our step-by-step guide on connecting a mixer to a PC for recording.
Start with the Gain Structure
When you use an audio mixer, setting the right gain structure is one of the most important things to remember. The amount of each sound source’s input is called its gain. If the gain is too high or too low, it can cause confusion or bad sound quality.
Put the gain on each channel to the right level first. But not so strong that it clips. The signal should be strong enough to keep out too much noise. Keep an eye on the amounts with the metering system on your mixer and make sure they stay in the right range, which is generally written in green or yellow. It’s time to drop the gain if your scores keep going up to the red.
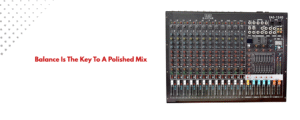
Balance the Volume Levels
After setting up your gain structure, you need to make sure that all of the lines have the same volume. First, move the faders around to make sure that each sound source can be heard without drowning out the others.
- When you’re in a band or recording, the vocals should usually be the most noticeable part of the mix.
- Guitars, drums, and other instruments should go well with the singing and not take away from it.
- Background sounds like effects, backing voices, and random noises should be kept at a steady low level so they don’t overpower the mix.
If you’re working with live audio, our mixing tips for livestreaming will help you adjust in real time.
Change the EQ
Equalization (EQ) is where you start shaping the sound to make it richer and clearer. Each channel on the mixer usually has EQ knobs for low (bass), midrange, and high (treble) frequencies.
- Low frequencies (bass): Cut down muddiness in instruments or voices by reducing the low end slightly. Boost only if the sound feels too thin.
- Mid frequencies: This is where most vocals and instruments sit. Be careful here—small tweaks can make a big difference.
- High frequencies (treble): Add brightness or clarity by boosting slightly, or reduce if there’s too much hiss or harshness.
The trick is to make subtle changes. Use EQ to fix problems, not to completely change the character of a sound.
Use Panning to Create Space
Panning lets you place sounds in the left, right, or center of the stereo field. This helps keep the mix from sounding crowded. For example:
- Keep vocals, bass, and kick drum centered.
- Pan guitars and background vocals slightly left or right.
- Spread drum elements across the stereo field for a live feel.
Proper panning creates a stereo image where each element has its own space.
Add Effects Carefully
Most mixers allow you to send audio to external effects like reverb, delay, or compression. Use effects sparingly to add depth and character:
- Reverb adds space and atmosphere.
- Delay can make vocals or instruments stand out.
- Compression can help even out volume levels and make a mix sound more polished.
Route these through your aux sends to maintain flexibility. Learn how mixers are evolving with built-in effects in our article on upcoming trends in mixer technology for 2025.

Monitor and Make Adjustments
Once everything sounds balanced, listen to your mix through different speakers or headphones. A mix that sounds great in headphones might not translate well to a PA system or car speakers. Make minor adjustments based on what you hear. Trust your ears more than your eyes.
Final Thoughts
Achieving the best sound balance with an audio mixer takes practice, patience, and a good ear. Start with a clean gain structure, balance your levels, tweak the EQ, and pan smartly. Use effects as finishing touches and always test your mix on different playback systems. With time and experimentation, your mixes will sound clearer, more dynamic, and truly professional. Whether working in a studio or managing live sound, mastering these audio mixing techniques and EQ settings will help you create the best sound balance possible.
If you’re looking to expand your audio gear collection or start a sound-related business, consider joining a business partnership program. Enjoy up to 45% off, free U.S. shipping, no monthly fees, and live customer support—perfect for retailers and audio professionals.
All Comments
After looking at a handful of the articles
on your site, I really like your way of writing a blog. I bookmarked it to
my bookmark webpage list and will be checking back in the near future.
Please visit my website too and let me know your opinion.