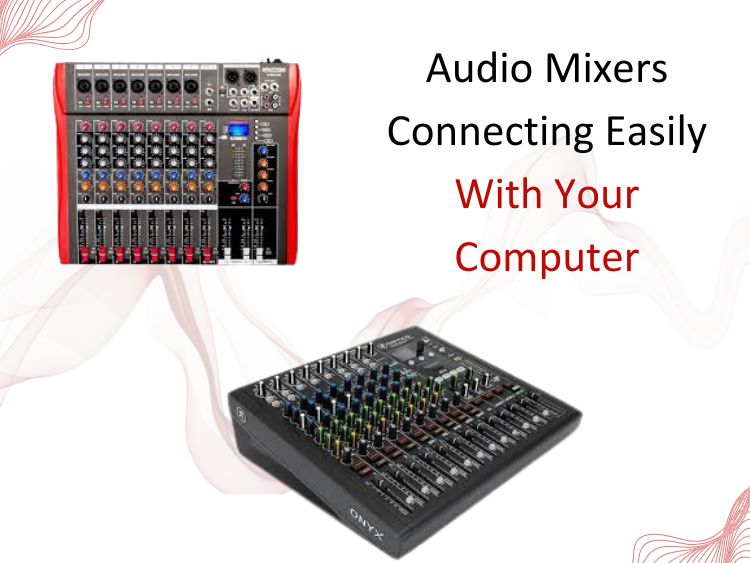
Owning a home studio brings new opportunities to content creators, podcasters, and music producers. Having a mixer connected to the computer enables control over sound quality and precision. Moreover, mixers help to blend instruments and microphones seamlessly. However, if you don’t have any experience with audio equipment, using a mixer and a computer can be a tad intimidating.
Fear not – the following guide will give you stepwise detailed instructions along with some tips from experts that will help you avoid common pitfalls related to setting up a studio.
Want to know the process of using a mixer for live recording? Read – How to Use a Mixer To Record Live Instruments!
Why Use a Mixer in the First Place?
Before we explain how, let’s take a look at why first.
Using a mixer, you can:
- Combine various sound inputs like microphones and instruments.
- Change levels of EQ, levels, panning, gain, etc. within the session.
- Send signals to several inputs such as monitor speakers, headphones, or a PC.
- Edit recordings in order to make them more uniform, balanced, and improve the quality.
What are Requirements to Use Audio Mixers?
- Mixer – Any type will work, but it should have a USB or audio interface.
- Cables – Could be USB, XLR, RCA, 1/4” TRS, 3.5mm or whatever your equipment uses.
- Computer – A Mac or PC will do, as long as it has a DAW installed.
- Audio Interface (Optional) – Only needed if you don’t have a USB connection on your mixer.
- DAW (Digital Audio Workstation) – Audacity, GarageBand, Ableton Live, Reaper, etc.
Step-by-Step: Connecting a Mixer to Your Computer
Step 1: Check Your Mixer’s Output Options
Most modern mixers will have a USB port that allows for a direct connection to the computer. If your mixer has USB, skip to step 3.
Otherwise, try to find some form of Main Out such as Control Room Out or Tape Out. You will need to connect this to an audio interface or a direct cable that will plug into the computer.
Step 2: Select the Proper Cord/Connection
According to your mixer type, this is what you need:
- USB Mixer: Use a standard USB cable
- Analog Mixer: Requires an RCA-to-3.5mm or 1/4” TRS-to-USB (through interface)
- Audio Interface (examples include: Focusrite Scarlett): Connect the output from the mixer into the interface input then connect the interface to the computer using USB
Pro Tip: Do not use the onboard mic input on your PC as it has very low quality. Proper audio interfaces or USB mixers provide superior sound.
Looking for a DJ specific mixer tool? Buy 5 Core Audio Mixer 8 Channel DJ Equipment with Bluetooth USB Sound Board Console.
Step 3: Set Up Drivers and Adjust Settings
After hardware connection, the following needs to be done:
- Connect the USB cables for audio output and input devices on your mixer and plug the device into the computer. If your mixer is a USB type, don’t forget to install the drivers.
- Launch your DAW and navigate into the audio tab.
- Pick the DAW as input/output, then select the inbuilt sound card as the sound processing unit for Windows.
In Windows:
- Selecting the Control Panel, heading to Sound, and proceeding to the Recording tab.
- Under the set options, activate the mixer as the Default Device.
For Mac:
- System Preferences – Check sound and mark it onto the input category.
- Tick the box of the mixer or the audio interface.
Step 4: Set Levels on the Mixer
Your mix preparation checklist is:
- Connect a microphone or an instrument into the desired channel.
- Rotate the gain knob for the respective channel to the specific region of just high enough to avoid clipping.
- EQ knobs should allow adjustment to bass, mid, treble balance highlighting emphasis and de-emphasis in a range.
- Use the pan control if you wish to make the change.
- Use fader/volume sliders to set the respective level, both master and individual levels along with other channels grouped with it.
Be careful: The too loud signal or distortion known as clipping can compromise the quality you seek. Look for clipping indicators that are at or slightly above the green in your mixer while avoiding red.
Step 5: Capture Within Your DAW
Launch your DAW and:
- Make a new audio track for recording.
- Choose the appropriate input channel (for a mixer or interface).
- Press record, and commence capturing your audio.
Monitoring in real time can be done through the headphone jack of the mixer or with your DAW, as long as you have low latency.
Final Thoughts
Nowadays, connecting a mixer to a computer isn’t limited to audio engineers. Using the right equipment, one can manage their audio through simple steps. From capturing your first podcast to your music production, a mixer allows you to record and manipulate sound effortlessly. To get best performing audio mixers, explore – 5 Core Audio Mixer collection.
Your sound can now be captured in the best possible clarity and quality, so, go ahead, plug in, turn on the device, and press record.


