Whether you’re working in a recording studio, live sound, or podcasting, audio mixers are an essential part of any audio production system. These devices can be exposed to dust, dirt, and oil from our fingers with frequent use, and over time, components can wear out and cause performance problems. However, properly caring for and maintaining your audio mixer is key to ensuring a long life and optimal performance. In this guide, we are going to tell you how and what steps you can take to clean and maintain your audio mixer so it ends up in as good a shape as it was years ago.
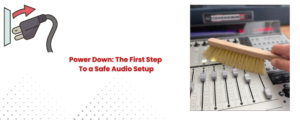
Step One: Turn Off and Unplug the Mixer
Before cleaning your audio mixer, safety must come first, so power it off and unplug it from all outlets and power sources. It prevents accidental electrocution and damaging the mixer inadvertently during the cleaning. It also ensures that you’re not moving anything around accidentally while you clean that could impact your workflow or mix.
The Use of Compressed Air and Soft Brushes for Cleaning Dust
Dust is the number one enemy of electronics. It may accumulate in delicate parts, causing the mixer to not function properly and overheating. Dusting, removing the first step before cleaning the mixer, etc.
- Compressed Air: A can of compressed air will blast dust from the mixer’s vents, faders, knobs, and nooks and crannies. Keep the nozzle a few inches away from the mixer to avoid blowing dust further in. Be sure to blow air softly, though — too much pressure may damage internal parts.
- Soft Brush: Use a soft-bristled brush on areas that you can’t get to with the compressed air, such as around the edges of knobs and faders. Just a small paintbrush or a specialized electronic brush. Gently brush crust and dirt off the mixer’s surface. That will prevent data loss and get the job done perfectly, especially for your fader and/or rotary knob position, where you can’t afford to skip a beat.

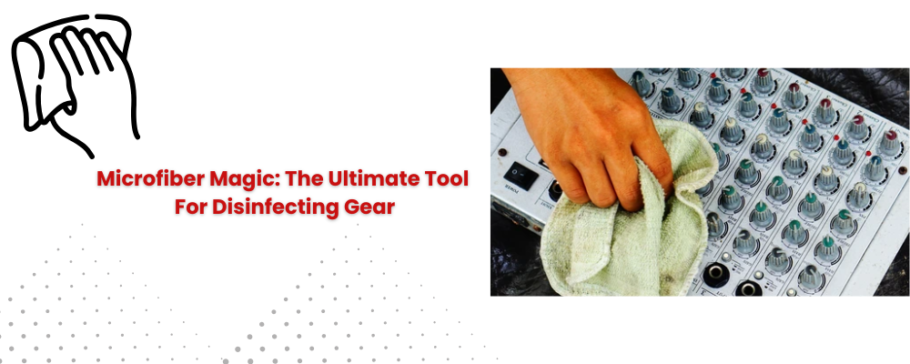
Disinfect Surfaces With a Microfiber Cloth
Then, once the dust has settled, it’s time to wipe down the outside of your mixer. Use a microfiber cloth, which won’t damage electronic components and won’t scratch the surfaces.
- Moisten the Cloth: Lightly dampen your microfiber cloth with water or a gentle solution. Also avoid heavy-duty chemicals and scrubbing agents that can damage the surface of a mixer and also its components.
- Wipe the Mixer: Using a gentle cloth, wipe all over the mixer, including the control panels, knobs, faders, and buttons. For stubborn spots or stains, spray a little isopropyl rubbing alcohol (70% or higher preferred) onto the cloth and go over the dirty spots.
- Clean the Display: If your mixer comes with a display screen, you’ll have to be more careful when cleaning it. Use a soft, lint-free cloth to wipe down the screen and never spray any chemicals directly on the screen. Also, you can use a screen-safe electronics cleaner to help keep it clear and not tempered.
Fader and Knob Cleaning
You will use an audio mixer, which includes faders and knobs to control levels and shape the sound. They can get dirty with time, and dust, oils from your skin and other debris may interfere with their working, causing bad performance or sticky movements.
- Clean the Faders: With a cotton swab soaked in a few drops of isopropyl alcohol, clean the grooves and tracks of the faders. Wipe carefully along the fader edges and let it completely evaporate before proceeding to the next. For more stubborn goo, blast it with compressed air and blow it out of the fader mechanism.
- Scrub the Knobs: Take a soft microfiber cloth or a small brush to get around the base of the knobs. Avoid too much pressure here since it could block the rotation of knobs. If necessary, scrub the knobs using a cotton swab soaked in alcohol, but don’t leave them excessively wet.

Pay Attention to Input and Output Jacks
Your audio mixer’s input and output jacks will be the core of your connectivity, but they can get filled with dust or debris almost too easily. Thus, keep these components clean to maintain signal flow and keep your mixer working properly.
- What To Do: Liberate Compressed Air: Use compressed air to blow out input and output jacks.
- Q-tips: For debris that is getting stuck in the jacks, use a Q-tip and work inside to dislodge it. Be careful to not scratch the connectors, so that no internal pins are damaged
Inspect and Clean the Ventilation
Dust and dirt accumulate on the ventilators of audio mixers, especially on models with built-in fans. Overheat will cause performance degradation due to localized heat build-up from blocked ventilation.
- Vents Maintenance: Prevent the accumulation of dust. Periodically inspect the mixer’s ventilation grilles in succession. If possible, blow it out with compressed air (built-up gunk can restrict airflow).
Tighten Loose Parts
It could also be caused by limited use and vibrations where screws or bolts loosen over time. If something is loose, your mixer won’t run correctly and can generate undesired sound or friction.
- Jumper Wires or a Black Box: Check for any loose screws or a component in the Mixer that needs tightening up. Place the screws, and use the screwdriver to tighten the screws without overtightening them to damage the screws.
How To Cable Management: Keep Your Setup Neat And Clean
Good cable management keeps the space organized and also ensures that everything works the way it is supposed to, without interference.
- Organize Cables: Use cable ties or clips to keep the cables in order and avoid tangling or damaging them. Pulled cables can negatively impact signal quality or break connectors.
- Inspect Your Cables: Regularly inspect your audio cables for damage. If it looks physically damaged, it might compromise the audio signals & connection quality, and you must replace it.
Update Software and Firmware
Newer mixers usually have firmware or software that controls various functions or features. Firmware updates for your mixer are essential to ensure everything runs smoothly and that you are able to enjoy the benefits of recent changes and bug fixes.
- Check for Updates: Go to the manufacturer’s website or open the mixer’s companion software and look for updates. If necessary, follow these instructions to upgrade the firmware of your mixer.
Proper Storage and Care
When not in use, it’s best to keep your audio mixer in a dry, dust-free environment.
- Avoid Direct Exposure to Sunlight: Prolonged exposure to sunlight can cause the components to be heated, and with time, they could get damaged.
- Cover it Up: If you are going to store it away for long use, cover it up with a dust cover to protect it from dirt and dust. Store in a cool and dry location to minimize damage due to humidity or heat.
Conclusion
You can clean and maintain your audio mixer without subjecting it to overwhelming work. Regularly doing so will help to ensure that the life of your equipment is as healthy as it can be, prolonging it and keeping it running at optimal performance. A well-maintained mixer will not only provide you with top-of-the-line sound quality, but it will also save you time and money in the long run. With a little bit of dusting and some care, your audio mixer will continue to pump incredible sound quality for each of your projects.